Halloween is the perfect time to get creative without breaking the bank. If you’ve been scrolling through Pinterest lately, you might have seen those spooky-cute, bleached Halloween tees popping up everywhere. Well, guess what? You can make your own for just $3 using supplies from Dollar Tree!
I originally shared this as an idea pin, but since so many of you were asking for details (especially about the measurements), I decided to put everything together in one easy step-by-step guide. These Dollar Tree reverse tie dye Halloween shirts are affordable, fun for kids and adults, and take less than an hour to make.
What is Reverse Tie Dye?
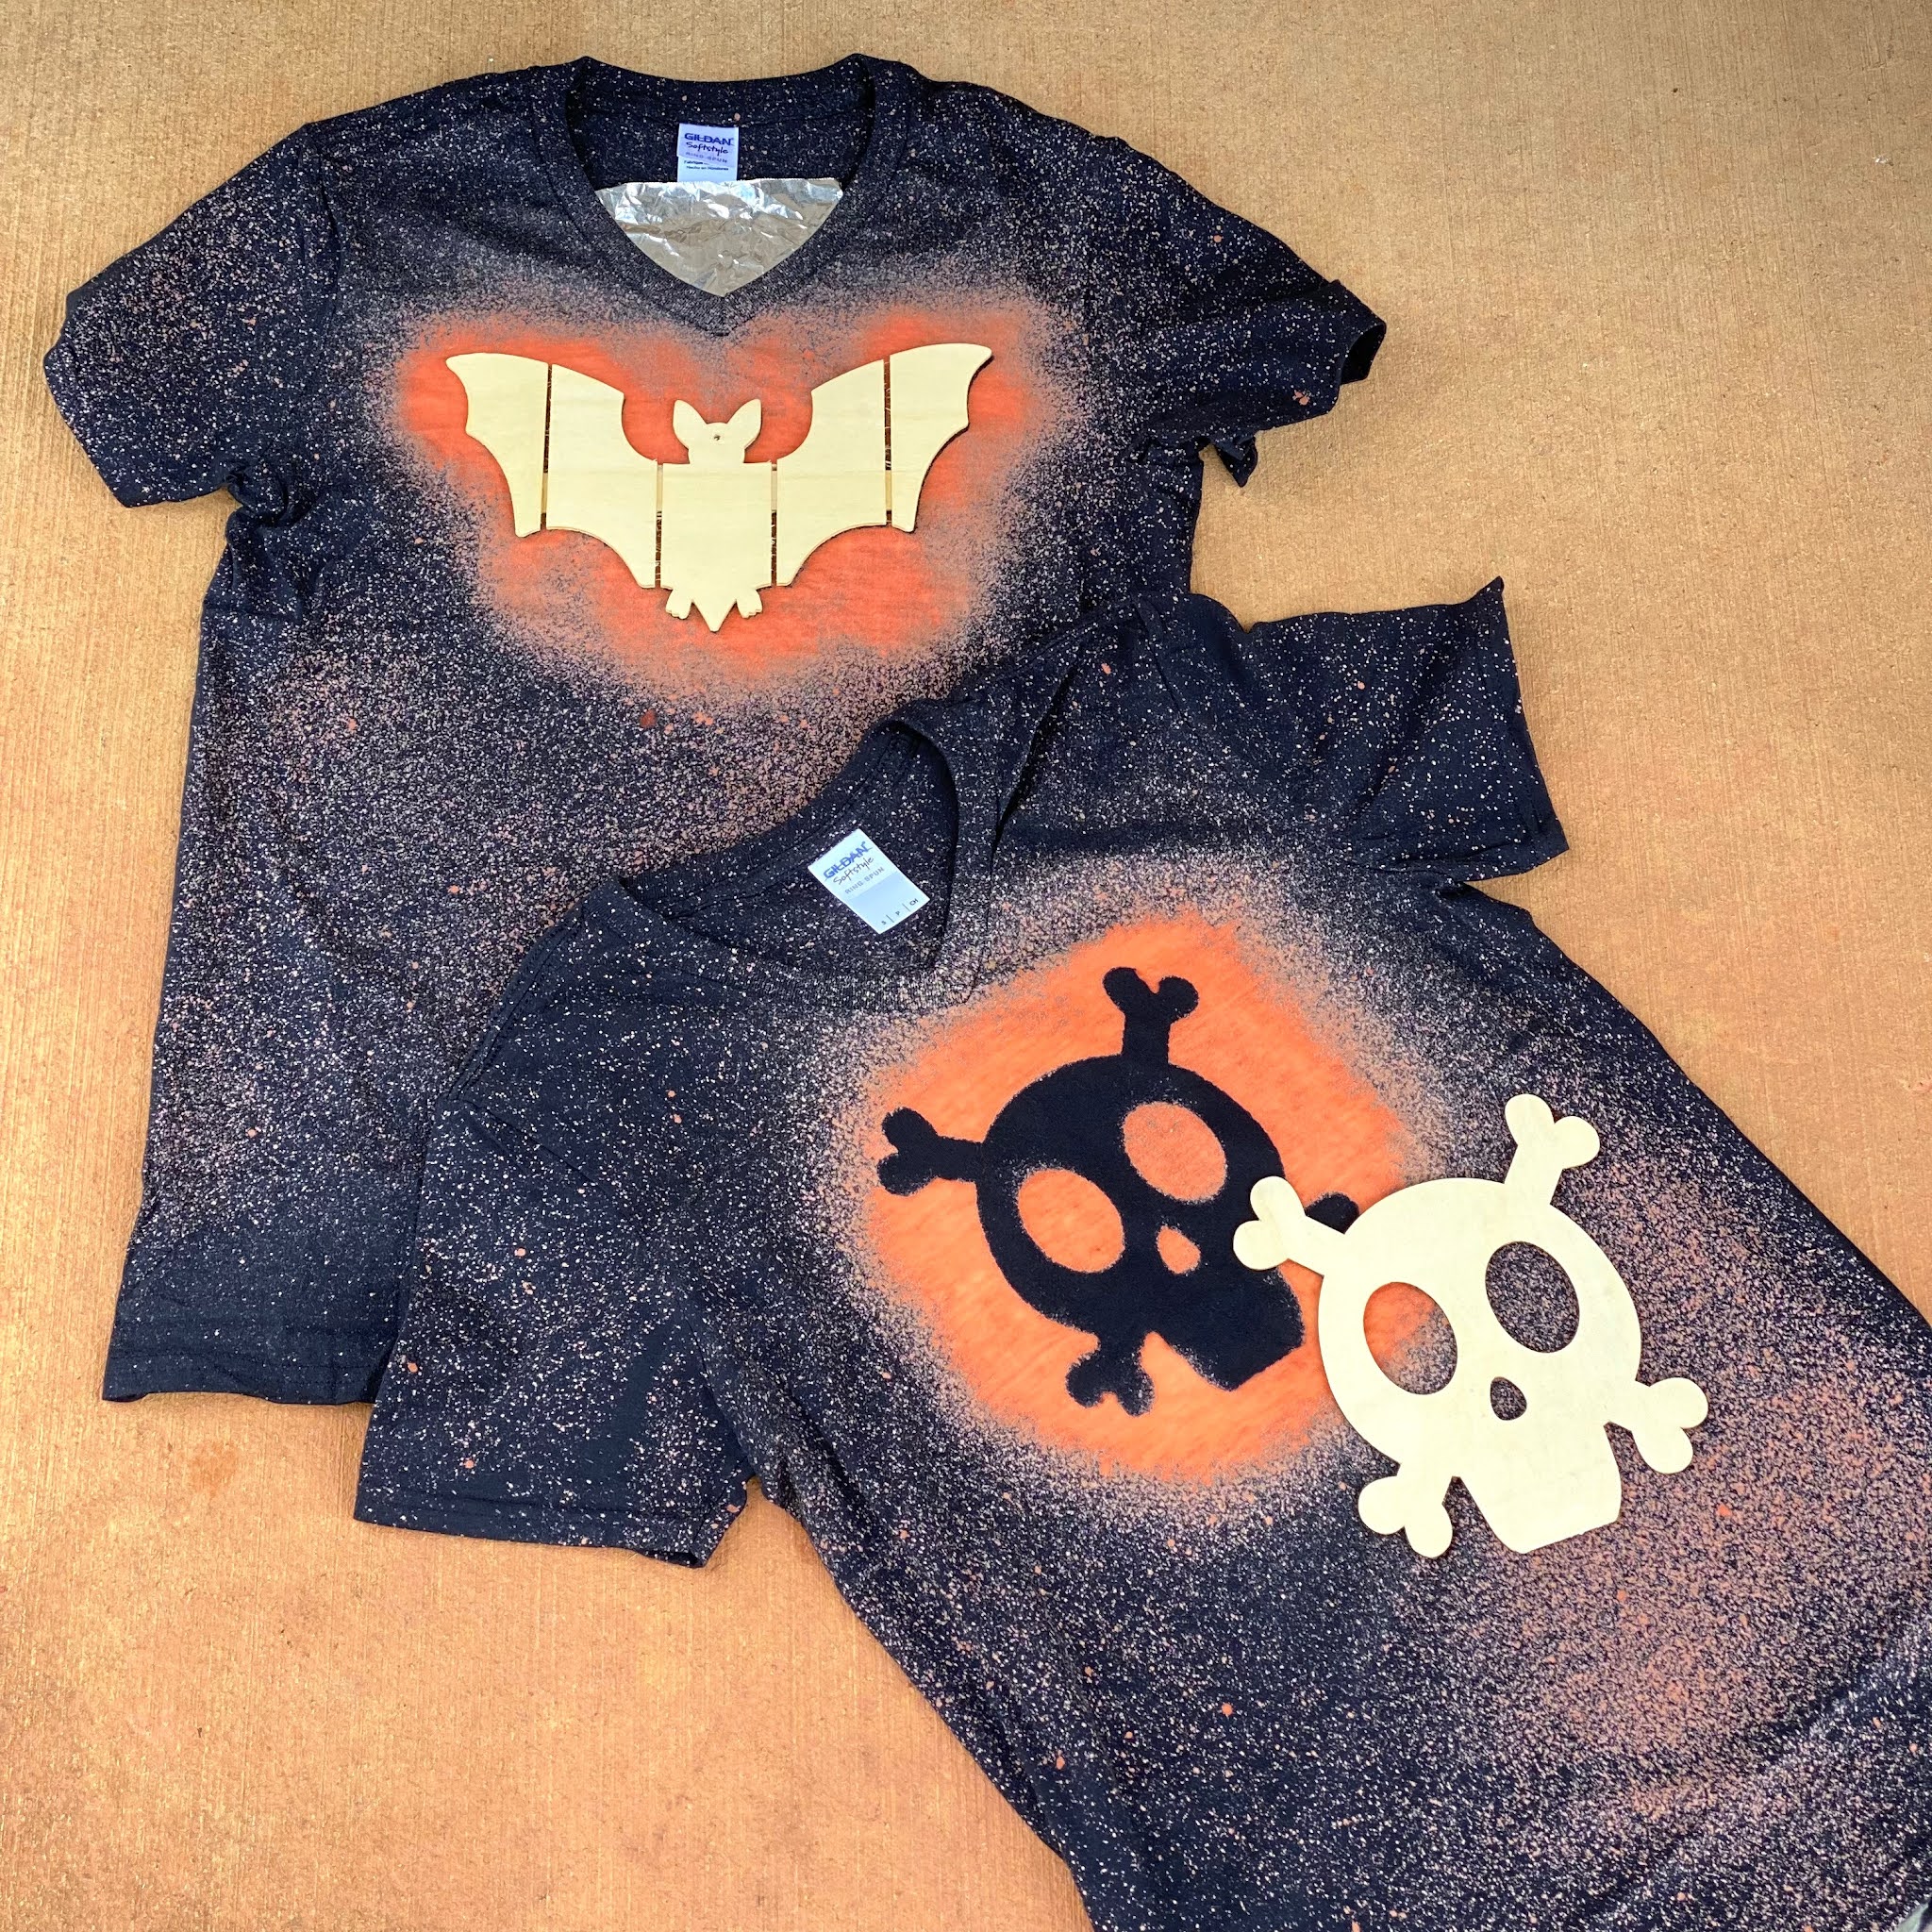
Unlike traditional tie dye where you add color, reverse tie dye uses bleach to remove color from dark fabric. The result? A striking, high contrast look that’s perfect for Halloween vibes, think creepy spiderwebs, glowing ghosts, or bold pumpkin shapes.
Supplies You’ll Need (All for $3 or Less!)
Most of these can be picked up at Dollar Tree or substituted with items you already have at home.
Black or dark-colored t-shirt (Dollar Tree has adult and youth sizes for $1.25 each)
Wooden Halloween cutouts or stencils (pumpkins, bats, ghosts, etc. – found in the Dollar Tree craft aisle)
Aluminum foil (to protect the back of the shirt)
Spray bottle (you can grab one from Dollar Tree’s cleaning aisle)
Bleach (household bleach works best)
Hydrogen peroxide (to neutralize the bleach)
Gloves (very important for safety)
Bucket or large container
Optional: If your Dollar Tree doesn’t carry shirts, you can grab budget-friendly multipacks of black tees [HERE].
Step-By-Step Instructions
1. Prep Your Shirt
Lay your shirt flat and slide a piece of aluminum foil between the front and back. This keeps the bleach from soaking through.
2. Mix Your Bleach Solution
In a spray bottle, combine 1 part bleach with 1 part water. (Example: 1 cup bleach + 1 cup water). Shake gently to mix.
💡 Tip: Always work in a well-ventilated area or outside.
3. Add Your Stencil
Place your Dollar Tree Halloween cutout on top of the shirt where you want your design to appear. You can tape it down lightly to keep it in place.
4. Spray and Wait
Lightly spray the shirt around the stencil, focusing on the areas you want to lighten. Don’t oversaturate, less is more.
Leave the shirt in direct sunlight for about 15 minutes. Watch as the bleach reacts and the design begins to appear.
5. Neutralize the Bleach
In a bucket, mix 1 cup of hydrogen peroxide per 1 gallon of water. Place the shirt in the solution and let it soak for about 30 minutes. This stops the bleaching process and protects your fabric.
6. Rinse and Wash
Rinse the shirt in cold water, then wash it separately in the washing machine for the first load. Dry as usual.
Safety Tips
Always wear gloves when handling bleach.
Work outside or in a well-ventilated space.
Keep bleach away from kids and pets.
Wash your shirt separately the first time to avoid bleach transfer.
Design Ideas
The best part of DIY Halloween shirts is the creativity! Try these ideas:
Spiderwebs – scrunch the shirt into a ball before spraying for a web effect.
Pumpkin face – cut out a jack-o-lantern stencil.
Ghostly mist – lightly spray without a stencil for a smoky, eerie look.
Bats in flight – use multiple bat stencils across the shirt.
Why This Project is Perfect for Families
This craft is quick, affordable, and fun for kids to help with (just keep them away from the bleach part!). They can help pick out stencils, spray the water bottle with supervision, or even make matching family Halloween shirts for trick-or-treating night.
FAQs
Can I use colored shirts instead of black?
Yes! Dark purples, blues, or greens work great for Halloween. Just make sure it’s a darker shade so the bleach design pops.
What if I don’t have hydrogen peroxide?
You can still rinse with cold water, but peroxide is best to fully neutralize the bleach.
Will the design last?
Yes! As long as you neutralize and wash properly, your Halloween tee will last for seasons to come.
Final Thoughts
For just $3 and less than an hour of your time, you can create custom DIY Dollar Tree reverse tie dye Halloween tees that look boutique-worthy. Whether you’re making one for yourself, your kids, or a whole group of friends, these shirts are guaranteed to turn heads this Halloween.
Pin this idea to your Halloween board and start crafting today, you’ll be amazed at how easy (and affordable) it is to get spooky style on a budget!
If you have any more questions, just let me know.


These look really cool
ReplyDeleteIt's just bleach and water? What gives them the orange look?
ReplyDeleteIt naturally does that. Pretty cool, huh?
DeleteIt does wash out so could use clothing dye, and re-dye the bleached out part orange.
Delete